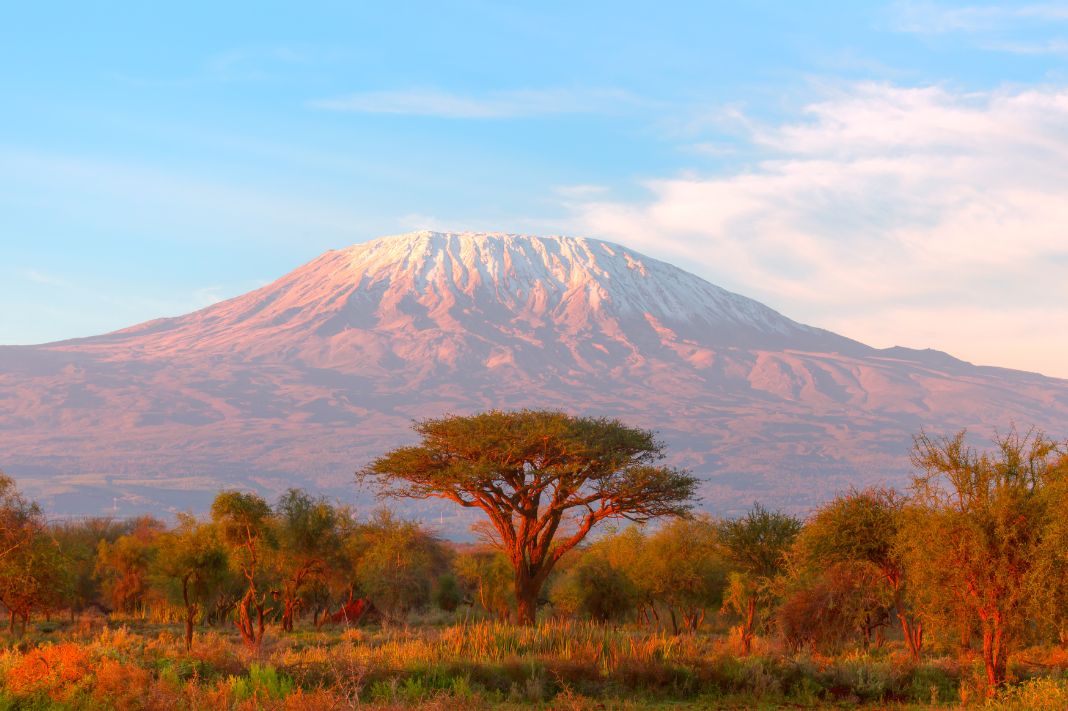
This itinerary offers a challenging and rewarding experience for those who wish to summit Mount Kilimanjaro. It provides you with the necessary information regarding driving distance, trekking time, altitude, meals included, and campsite locations.The Northern Circuit offers a more secluded trekking experience, making it an ideal option for those who want to avoid the crowds.
| Daily information and program | Overnight | ||||||||
| Day 1: Arrival and pre-climb briefing day
Today has no planned activities and is only an arrival day for you to reach your base lodge in time for a pre-climb briefing (time to be confirmed) with your mountain guide.
|
Bristol Cottages
Style: Budget range lodge |
| Day 2: Moshi to Londrossi gate to Big tree (Mti Mkubwa) camp
You will be transferred by road from Moshi (09:00am) to Londorossi gate. After registration you continue on the 4×4 track till the trail head where you begin your trek through the rain forest zone with your guide. The forest is thick and diverse with flora / fauna, and you may experience rain this afternoon which is common in this zone making the path slightly slippery. A short and winding path takes you steadily to the first camp.
|
Big tree (Mti Mkubwa) Camp
Style: Shared Public campsite Altitude: 2780m or 9120ft No websites |
| Day 3: Big tree (Mti Mkubwa) camp to Shira one camp
This morning you quickly leave the forest zone on a steep path as the dense vegetation slowly eases into the Heather and moorland zone. The remainder of the day takes you on a steady hike across the Shira ridge where views of the Shira peak (the third of Kilimanjaro’s volcanic cones) gives you the spectacular jagged scenery of this eroded peak.
|
Shira One Camp
Style: Shared Public campsite Altitude: 3505m or 11500ft No websites
|
| Day 4: Shira One camp to Shira Cathedral Peak to Shira Two camp
Todays hike takes you gradually across the Shira Plateau within the heather and moorland and an optional extra hike to the Shira Cathedral peak (3880m) before gradually taking you to Shira two camp. Shira is the third of Kilimanjaro’s volcanic cones and has been shaped by lava and volcanic activity to create a stunning jagged peak and offering a unique western view of Kibo, the highest of the peaks and your final destination on the tour.
|
Shira Two Camp
Style: Shared public campsite Altitude: 3845m or 12615ft No websites |
| Day 5: Shira Two camp to Lava Tower (optional) to Moir Hut Camp
Today you take a steady pace across the edges of the heather and moorland then into the alpine desert towards the northern Kilimanjaro area. If your fitness is high enough you can take an optional detour via the Lava Tower camp which is great for acclimatization. Moir hut is quite an isolated camp mostly used by those on the Kilimanjaro Northern Circuit but provides a unique northern view of the Kibo cone. You can also optionally hike to the nearby Lent group from Moir hut for vies of these eroded cones and ridges from where you may be able to gaze down into the wilderness plains of Kenya to the north.
|
Moir Hut Camp
Style: Shared public campsite Location: Alpine desert, Kilimanjaro National Park Altitude: 4140m or 13585ft No websites No reviews |
| Day 6: Moir Camp to Buffalo (Pofu) camp
Leaving behind the Moir valley you trek on a relatively steep path to the summit of the Lent Hills (if you didn’t reach here the day before) before circling around north of the Kibo cone into the Alpine desert and enjoying this remote part of the mountain with unique scenery of the Northern Kilimanjaro peak and the Kenyan plains below.
|
Buffalo (Pofu) Camp
Style: Shared special campsite Location: Alpine desert Kilimanjaro National Park Altitude: 4030m or 13220ft No websites No reviews |
| Day 7: Buffalo (Pofu) camp to Third Cave Camp
Your final day on the northern circuit bypass today taking you through the remote mountain wilderness of the North which is probably the least used trail on Kili. Your hike takes you back out of the alpine desert through the buffalo ridge and the remote valleys until the drier heather and moorland area around the Third Cave Camp.
|
Third Cave Camp
Style: Shared public campsite Altitude: 3935m or 12795ft No websites |
| Day 8: Third cave camp to School Hut Camp (or alternatively Kibo Camp)
Your hike today takes you abruptly towards the Kibo cone steadily climbing up and over the edges of the alpine desert journeying on the edges of the Kibo saddle. The relatively short distance today means you have plenty of time at your summit camp to rest and prepare for the summit attempt tonight.
|
School Hut Camp
Style: Shared public campsite Location: Alpine desert, Kilimanjaro National Park Altitude: 4715m or 15470ft No websites No reviews |
| Day 9: School Hut Camp to Gilman’s point to Uhuru peak to Mweka camp
In the early morning (around 00:00am) you begin your final ascent to the summit of Uhuru peak through the arctic zone. The trek is a steep hike over loose volcanic scree through the dark and cold night and takes a slow pace in a zig-zag pattern towards Gilman’s Point (5681m or 18640ft) which is your first stop on the Kibo crater rim. From here a short (but difficult) hike remains to take you past Stella point (the first stop on the rim for those summiting from Barafu camp / the Southern circuit) and further around till Uhuru Peak (5895m or 19341ft), the highest point in Africa. You usually don’t spend that long at the peak due to the extreme altitude and will descend down via Stella point until the southern circuit base camp (Barafu). After a recovery meal you continue the descent through the alpine desert, heather and moorland and until the rainforest where you stop for the night.
|
Mweka Camp
Style: Shared public campsite Altitude: 3080m or 10105ft No websites |
| Day 10: Mweka camp to Mweka gate to Moshi town
Your final day on Kilimanjaro is a descent through the southern rain forest until Mweka gate where our vehicle will be waiting to take you back to Moshi town. Usually, the crew will leave you at Mweka gate and it’s a perfect opportunity to say goodbye to your crew who all generally head directly home from the end gate.
|
Bristol Cottages
Style: Mid-range lodge |
| Day 11: Departure day or continue with next activity
Today has no planned activities and our services end after check-out (10:00am)
|
None included but optionally available |
| Daily information and program | Overnight | ||||||||
| Day 1: Arrival and pre-climb briefing day
Today has no planned activities and is only an arrival day for you to reach your base lodge in time for a pre-climb briefing (time to be confirmed) with your mountain guide.
|
Bristol Cottages
Style: Budget range lodge |
| Day 2: Moshi to Londrossi gate to Big tree (Mti Mkubwa) camp
You will be transferred by road from Moshi (09:00am) to Londorossi gate. After registration you continue on the 4×4 track till the trail head where you begin your trek through the rain forest zone with your guide. The forest is thick and diverse with flora / fauna, and you may experience rain this afternoon which is common in this zone making the path slightly slippery. A short and winding path takes you steadily to the first camp.
|
Big tree (Mti Mkubwa) Camp
Style: Shared Public campsite Altitude: 2780m or 9120ft No websites |
| Day 3: Big tree (Mti Mkubwa) camp to Shira one camp
This morning you quickly leave the forest zone on a steep path as the dense vegetation slowly eases into the Heather and moorland zone. The remainder of the day takes you on a steady hike across the Shira ridge where views of the Shira peak (the third of Kilimanjaro’s volcanic cones) gives you the spectacular jagged scenery of this eroded peak.
|
Shira One Camp
Style: Shared Public campsite Altitude: 3505m or 11500ft No websites |
| Day 4: Shira One camp to Shira Cathedral Peak to Shira Two camp
Todays hike takes you gradually across the Shira Plateau within the heather and moorland and an optional extra hike to the Shira Cathedral peak (3880m) before gradually taking you to Shira two camp. Shira is the third of Kilimanjaro’s volcanic cones and has been shaped by lava and volcanic activity to create a stunning jagged peak and offering a unique western view of Kibo, the highest of the peaks and your final destination on the tour.
|
Shira Two Camp
Style: Shared public campsite Altitude: 3845m or 12615ft No websites |
| Day 5: Shira Two camp to Lava Tower (optional) to Moir Hut Camp
Today you take a steady pace across the edges of the heather and moorland then into the alpine desert towards the northern Kilimanjaro area. If your fitness is high enough you can take an optional detour via the Lava Tower camp which is great for acclimatization. Moir hut is quite an isolated camp mostly used by those on the Kilimanjaro Northern Circuit but provides a unique northern view of the Kibo cone. You can also optionally hike to the nearby Lent group from Moir hut for vies of these eroded cones and ridges from where you may be able to gaze down into the wilderness plains of Kenya to the north.
|
Moir Hut Camp
Style: Shared public campsite Location: Alpine desert, Kilimanjaro National Park Altitude: 4140m or 13585ft No websites No reviews |
| Day 6: Moir Camp to Buffalo (Pofu) camp
Leaving behind the Moir valley you trek on a relatively steep path to the summit of the Lent Hills (if you didn’t reach here the day before) before circling around north of the Kibo cone into the Alpine desert and enjoying this remote part of the mountain with unique scenery of the Northern Kilimanjaro peak and the Kenyan plains below.
|
Buffalo (Pofu) Camp
Style: Shared special campsite Location: Alpine desert Kilimanjaro National Park Altitude: 4030m or 13220ft No websites No reviews |
| Day 7: Buffalo (Pofu) camp to Third Cave Camp
Your final day on the northern circuit bypass today taking you through the remote mountain wilderness of the North which is probably the least used trail on Kili. Your hike takes you back out of the alpine desert through the buffalo ridge and the remote valleys until the drier heather and moorland area around the Third Cave Camp.
|
Third Cave Camp
Style: Shared public campsite Altitude: 3935m or 12795ft No websites |
| Day 8: Third cave camp to School Hut Camp (or alternatively Kibo Camp)
Your hike today takes you abruptly towards the Kibo cone steadily climbing up and over the edges of the alpine desert journeying on the edges of the Kibo saddle. The relatively short distance today means you have plenty of time at your summit camp to rest and prepare for the summit attempt tonight.
|
School Hut Camp
Style: Shared public campsite Location: Alpine desert, Kilimanjaro National Park Altitude: 4715m or 15470ft No websites No reviews |
| Day 9: School Hut Camp to Gilman’s point to Uhuru peak to Mweka camp
In the early morning (around 00:00am) you begin your final ascent to the summit of Uhuru peak through the arctic zone. The trek is a steep hike over loose volcanic scree through the dark and cold night and takes a slow pace in a zig-zag pattern towards Gilman’s Point (5681m or 18640ft) which is your first stop on the Kibo crater rim. From here a short (but difficult) hike remains to take you past Stella point (the first stop on the rim for those summiting from Barafu camp / the Southern circuit) and further around till Uhuru Peak (5895m or 19341ft), the highest point in Africa. You usually don’t spend that long at the peak due to the extreme altitude and will descend down via Stella point until the southern circuit base camp (Barafu). After a recovery meal you continue the descent through the alpine desert, heather and moorland and until the rainforest where you stop for the night.
|
Mweka Camp
Style: Shared public campsite Altitude: 3080m or 10105ft No websites |
| Day 10: Mweka camp to Mweka gate to Moshi town
Your final day on Kilimanjaro is a descent through the southern rain forest until Mweka gate where our vehicle will be waiting to take you back to Moshi town. Usually, the crew will leave you at Mweka gate and it’s a perfect opportunity to say goodbye to your crew who all generally head directly home from the end gate.
|
Bristol Cottages
Style: Mid-range lodge |
| Day 11: Departure day or continue with next activity
Today has no planned activities and our services end after check-out (10:00am)
|
None included but optionally available |